
Soap-making is a centuries-old tradition that has evolved over time, and one of the most popular methods is cold-process soap making. This technique is loved for its simplicity, effectiveness, and the ability to create rich, natural, and gentle soaps. If you’re passionate about natural products and want to create your own herbal soap, organic soap, or even turmeric soap for specific benefits, you’re in the right place! In this guide, we’ll walk you through the process of creating beautiful handmade soaps from scratch. Whether you’re looking for a natural body wash, a soap for men, or something soothing like unscented body wash, cold-process soap making offers endless possibilities.
What is Cold Process Soap Making?
Cold process soap making is a traditional method of making soap by mixing oils with lye (sodium hydroxide) and allowing the chemical reaction called saponification to occur over time. Unlike hot-process soap, where heat is applied to speed up the saponification process, cold-process soap is made at room temperature, which preserves the natural benefits of the ingredients.
The benefits of using cold-process soap are clear. Handmade soap made with natural ingredients such as olive oil, coconut oil, and essential oils can provide nourishment and hydration to the skin, unlike many commercial soaps that contain harsh chemicals and artificial fragrances. Cold-process soap allows for complete control over the ingredients, making it an ideal choice for those seeking a natural, herbal, or organic soap solution.
Essential Ingredients for Cold Process Soap
-
Oils and Fats: Oils are the base of any soap. Common oils used in cold-process soap making include:
- Olive Oil: Known for its moisturizing properties, olive oil creates a gentle lather and is perfect for those with sensitive skin.
- Coconut Oil: Provides excellent lather and a firm bar. It’s commonly used in soap for its ability to cleanse the skin deeply.
- Palm Oil: Often used to create a harder soap bar. Ensure you use sustainably sourced palm oil.
- Castor Oil: Helps boost lather, making it bubbly and creamy.
- Shea Butter or Cocoa Butter: Adds richness to the soap and nourishes the skin.
-
Lye (Sodium Hydroxide): Lye is a necessary ingredient for soap making, but it must be handled with care as it’s a caustic substance. It reacts with the oils during saponification to create soap and glycerin. After curing, no lye remains in the final product, as it is completely neutralized during the process.
-
Water: Water is used to dissolve the lye and help it mix with the oils. Distilled water is preferred for purity.
-
Essential Oils or Fragrances: Essential oils are a fantastic way to add natural fragrance to your soap. Depending on your skin type or preferences, you can use oils like lavender, peppermint, or tea tree. For example, tea tree body wash is a popular choice for its antibacterial and soothing properties. You can also add fragrances for a more tailored scent, but always ensure that they are skin-safe.
-
Herbs and Additives: To create an herbal soap, you can incorporate dried flowers, herbs, and even spices such as turmeric. For example, turmeric soap is well-known for its anti-inflammatory and brightening properties. Black soap, traditionally used in African skincare, often contains ingredients like plantain skins, palm kernel oil, and cocoa pods for skin healing.
How to Make Cold Process Soap: Step-by-Step
1. Gather Your Materials
Before you begin, make sure you have all the necessary equipment. You will need:
- A scale (to measure oils and lye)
- A thermometer (to check temperatures)
- A stick blender or hand whisk (for blending)
- Soap molds (silicone or wooden)
- A stainless steel or heat-resistant glass container for mixing the lye
- A spatula or spoon
- Safety gear: gloves, goggles, and long sleeves
2. Calculate the Recipe
Using a lye calculator (available online), input the oils you plan to use to determine the correct amount of lye and water needed for saponification. A balanced recipe will ensure that all the lye is used up in the chemical reaction and no excess remains in the soap. The oils you select will also affect the final soap’s texture and lather. For example, a mix of olive oil, coconut oil, and shea butter will give you a nourishing and moisturizing soap.
3. Mix the Lye Solution
Wearing your safety gear, carefully pour the measured lye into the water (never the other way around). Stir slowly until the lye dissolves. The mixture will heat up, so allow it to cool to around 100-120°F (38-49°C).
4. Prepare the Oils
While the lye solution cools, measure and melt the oils in a separate container. For solid oils like coconut oil or shea butter, heat them gently until they’re fully melted. Once the oils are melted and mixed, let them cool to around the same temperature range (100-120°F or 38-49°C) as the lye solution.
5. Combine the Oils and Lye Solution
When both the oils and lye solution have cooled to the right temperature, slowly pour the lye solution into the oils while stirring gently. Blend using a stick blender or hand whisk until the mixture reaches “trace.” This is when the soap begins to thicken and leaves a trail on the surface when you lift the blender. This stage is crucial because it indicates that saponification is happening.
6. Add Essential Oils, Herbs, or Additives
Once the soap reaches trace, you can add your chosen essential oils, herbs, or other additives like turmeric, tea tree oil, or activated charcoal. Stir the mixture thoroughly to ensure the ingredients are well incorporated. For instance, adding turmeric soap or black soap ingredients at this stage ensures that the herbal properties are preserved in the soap. If you’re making unscented body wash, simply skip the fragrance oils.
7. Pour the Soap Into Molds
Pour the soap mixture into your prepared molds. Gently tap the molds on the counter to eliminate air bubbles. If desired, you can top the soap with dried herbs or flowers for decoration and added benefits.
8. Cure the Soap
Once the soap is poured into the molds, cover them with a towel or blanket to keep the heat in and allow the soap to set. The soap will begin to harden in 24 to 48 hours, but it needs to cure for at least 4 to 6 weeks. During this curing period, the soap loses excess water and hardens further, ensuring that it lasts longer when used.
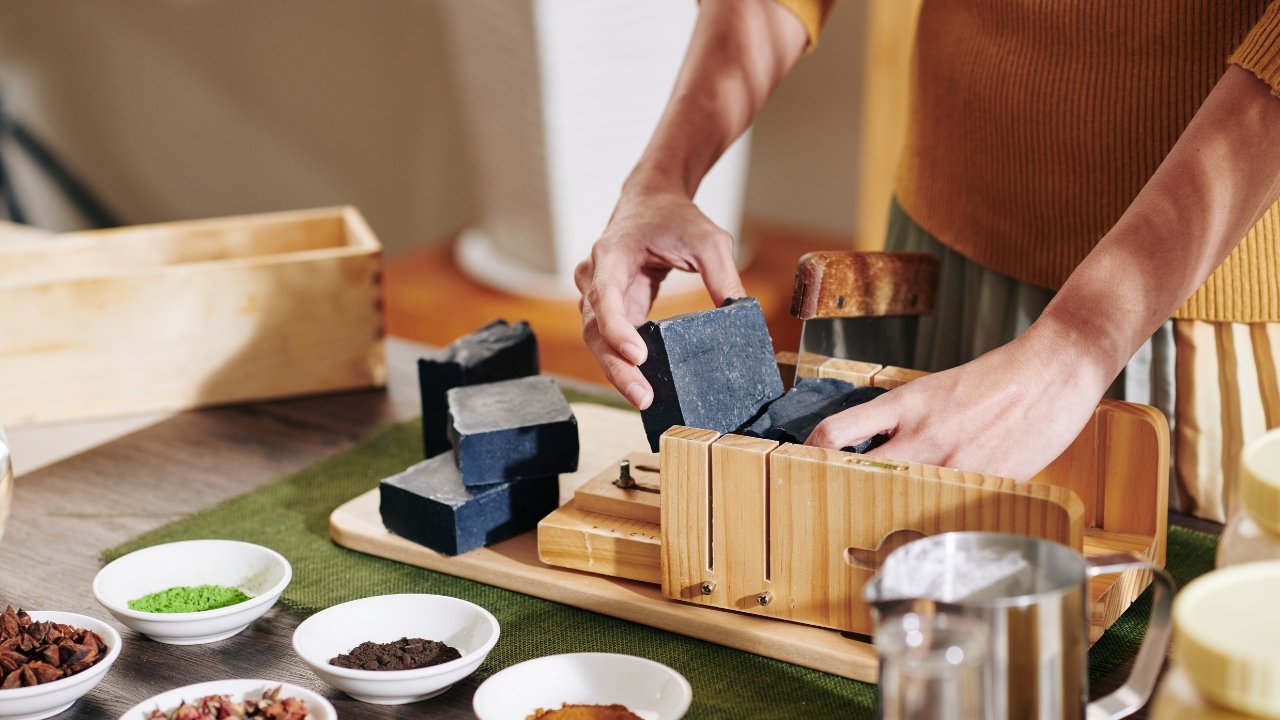
9. Unmold and Cut the Soap
After the soap has hardened, remove it from the molds and cut it into bars. Be sure to allow the soap to cure for the full amount of time before use, as fresh soap can be too soft and may dissolve quickly.
Types of Cold Process Soaps
-
Organic Soap: Organic soap is made from oils that are certified organic, meaning they are grown without the use of synthetic pesticides or fertilizers. It’s a great option for those who want the most natural, chemical-free soap possible.
-
Herbal Soap: Herbal soap incorporates dried herbs, flowers, and natural extracts. These soaps often have soothing properties, making them perfect for those with sensitive skin. Lavender, chamomile, and rose petals are popular choices.
-
Turmeric Soap: Turmeric is known for its anti-inflammatory and skin-brightening properties. Making turmeric soap involves adding powdered turmeric to the soap mixture, which creates a rich yellow color and offers a range of skin benefits, especially for those with acne or dark spots.
-
Black Soap: Traditional black soap is made with plantain skins, cocoa pods, and palm kernel oil, often used in West African skincare for its deep-cleansing and healing properties. It’s an excellent option for acne-prone skin and helps balance oily skin.
-
Natural Soap for Men: Men’s soaps tend to focus on fresh, woody, or spicy scents, with ingredients that help cleanse and rejuvenate the skin. Think of adding sandalwood, cedarwood, or tea tree essential oils for an invigorating experience.
-
Tea Tree Body Wash: Tea tree oil is famous for its antimicrobial properties, making it an excellent choice for those dealing with body acne or irritated skin. Tea tree body wash, made with natural soap bases, can help with oily skin, acne, and other skin concerns.
-
Unscented Body Wash: For people with sensitive skin, an unscented body wash or soap is the best option. Cold-process soap made with ingredients like olive oil, coconut oil, and shea butter without added fragrances can be soothing and gentle.
Benefits of Handmade Cold Process Soap
-
No Harsh Chemicals: Cold-process soap is free of synthetic detergents and preservatives, which are often found in commercial soaps. It’s made from natural oils and ingredients, making it safer and gentler on the skin.
-
Hydrating: Unlike commercial soaps, which can strip the skin of its natural oils, handmade soaps are rich in glycerin, a natural humectant that draws moisture to the skin.
-
Customizable: Cold-process soap allows you to control the ingredients. Whether you want to create organic soap, herbal soap, or a specific scent or benefit like turmeric soap, you can tailor the recipe to your preferences.
-
Long-Lasting: Handmade soap typically lasts longer than commercial soaps due to the high-quality ingredients and the curing process. It’s also a sustainable option for those wanting to reduce plastic waste, as many homemade soaps come in minimal packaging.
Conclusion
Making cold-process soap at home is an enjoyable, creative, and rewarding experience that allows you to take control of the ingredients that go into your soap. Whether you’re making herbal soap, organic soap, turmeric soap, or a natural body wash like tea tree body wash, this process enables you to craft the perfect soap for your skin. The possibilities are endless, and you can customize the soap to address your skin’s needs, whether it’s for acne, dryness, or simply a natural, luxurious cleansing experience.